Post-processing#
After the FSI simulations, the last step of VaSP is post-processing the results.
The src/vasp/postprocessing directory is organized into several sub-packages and modules, each dedicated to different aspects of postprocessing for the VaSP project.
The primary focus is on handling mesh data (postprocessing_mesh), postprocessing using FEniCS (postprocessing_fenics), and postprocessing with HDF5 files (postprocessing_h5py). Here’s an outline of the structure:
src/
└── vasp/
    └── postprocessing/
        ├── __init__.py
        ├── log_plotter.py
        ├── postprocessing_common.py
        ├── predeform_mesh.py
        |
        ├── postprocessing_mesh/
        │   ├── __init__.py
        │   ├── create_refined_mesh.py
        │   ├── postprocessing_mesh_common.py
        │   └── separate_mesh.py
        |
        ├── postprocessing_fenics/
        │   ├── __init__.py
        │   ├── compute_hemodynamics.py
        │   ├── compute_stress_strain.py
        │   ├── create_hdf5.py
        │   ├── create_separate_domain_visualization.py
        │   └── postprocessing_fenics_common.py
        |
        └── postprocessing_h5py/
            ├── __init__.py
            ├── chroma_filters.py
            ├── create_hi_pass_viz.py
            ├── create_spectrograms_chromagrams.py
            ├── create_spectrum.py
            ├── postprocessing_h5py_common.py
            └── spectrograms.py
In the following, we will give an overview and explanations for each scripts.
Top-Level Directory: postprocessing#
General Utilities: Contains general utility scripts
log_plotter.py,predeform_mesh.py, andpostprocessing_common.py.log_plotter.py- The usage is explained here. This is to extract information from a log file generated during the run, and is particularly useful when running FSI simulations on the cluster.predeform_mesh.py- This is used to pre-deform the mesh prior to running pulsatile FSI. It is assumed that pre-deformation simulation has been already performed.
This script is available as a following command:
vasp-predeform-mesh --folder /path/to/your/result --scale-factor -1
postprocessing_mesh#
Purpose: Focuses on handling mesh data used in simulations for later post-processing purposes.
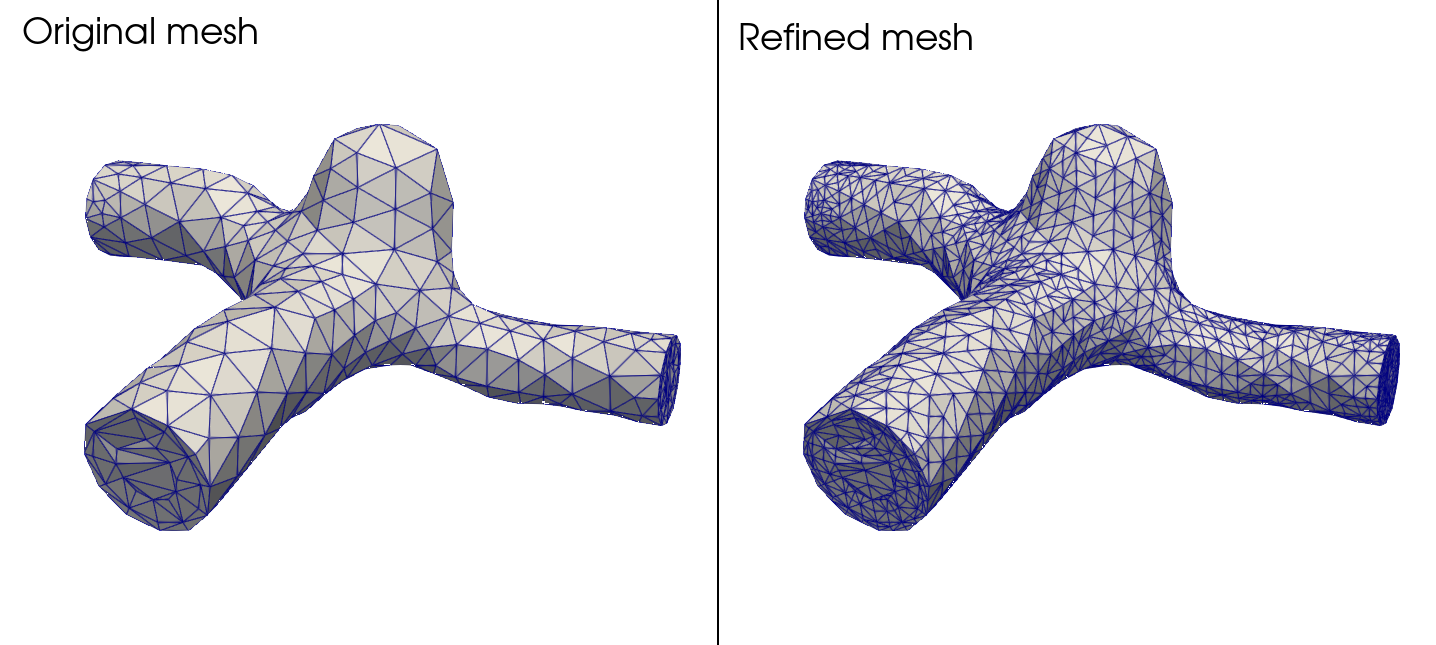
create_refined_mesh.py- InturtleFSI, there is a way to save visualization file with refined mesh viasave-degparameter. To utilize such a functionality in the other parts of the post-processing, it is necessary to create a stand-alone refined mesh. This script is dedicated for that and can be run as follows:
vasp-refine-mesh --folder /path/to/your/result
Normally, vasp-refine-mesh will find the original (non-refined) mesh automatically, but the user can specify the path to the mesh using --mesh-path as a command-line argument.
As a result, the user should get a HDF5 file named mesh_refined.h5 under Mesh folder in your result folder.
The following image is an example of original and refined mesh.

Fig. 5 An example of refined mesh generated by vasp-refine-mesh function#
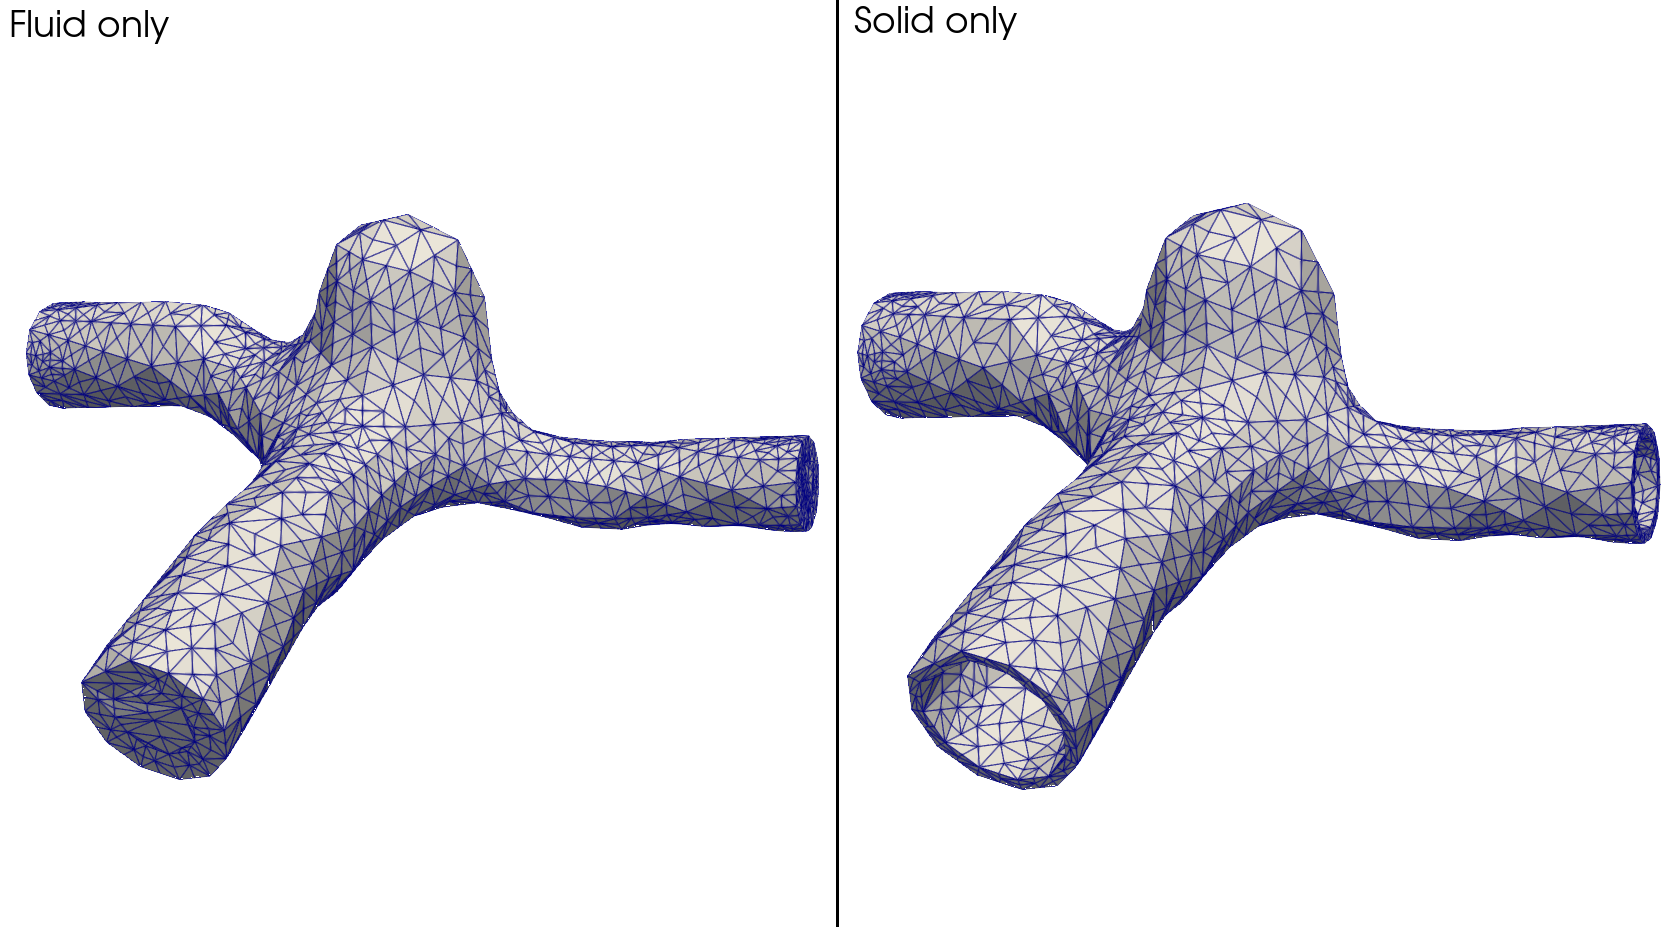
separate-mesh.py- By default,turtleFSIshows visualizations with a whole domain (fluid + solid). However, it is convenient to visualize the results for fluid and solid separately. Furthermore, we will utilize those separated meshes for computing variables that are only relevant for each domains, such as stresses inside the solid.
To generate separated meshes, please run
vasp-separate-mesh --folder /path/to/your/result
Same as vasp-refine-mesh, VaSP will automatically find a mesh and will generate separate meshes for both original and refined mesh. Therefore, after running both vasp-refine-mesh and vasp-separate-mesh, Mesh folder inside your result folder should look like this:
Mesh/
├── mesh.h5
├── mesh_fluid.h5
├── mesh_solid.h5
├── mesh_refined.h5
├── mesh_refined_fluid.h5
└── mesh_refined_solid.h5
The following image shows an example of separated fluid and solid domain with refined mesh.

Fig. 6 An example of fluid and solid mesh generated by vasp-separate-mesh function#
postprocessing_fenics#
Purpose: Dedicated to postprocessing tasks related to the FEniCS, for computing hemodynamic indices, stress and strain metrics, creating HDF5 files, visualizing separate domains, and common FEniCS postprocessing utilities.
create_hdf5.py- This script is the initial step in post-processing with FEniCS. It’s necessary because FEniCS cannot directly read.xdmfvisualization files for post-processing. The script generates a folderVisualization_separate_domainand two HDF5 files inside:
u.h5: Contains velocity data for the fluid domaind_solid.h5: Contains displacement data for the solid domain
These HDF5 files can be used by FEniCS for computing various metrics.
Usage:
The script is available as a command-line tool:
vasp-create-hdf5 --folder /path/to/your/result
Additional options available as command-line arguments:
Time range selection:
–start-time
Example with options:
vasp-create-hdf5 --folder /path/to/your/result --start-time 0.951 --end-time 1.902 --stride 2 --extract-entire-domain
This command will process data from time 0.951 to 1.902 (usually second cardiac cycle), using every second time step, and extract displacement for the entire domain. Note: This script runs only in serial.
create_separate_domain_visualization.py- This script generates separate visualization files for fluid and solid domains, using the HDF5 files created by the previous step.
Usage: Run the following command:
vasp-create-separate-domain-viz --folder /path/to/your/result
Output:
The script creates files inside Visualization_separate_domain:
velocity_fluid.xdmf: Visualization file for fluid velocity
displacement_solid.xdmf: Visualization file for solid displacement
These files are generated based on the .h5 files previously created.
Note:
This script supports parallel execution with MPI for potentially faster processing. To run in parallel, use:
mpirun -np <number_of_processes> vasp-create-separate-domain-viz --folder /path/to/your/result
compute_hemodynamics.py- This script computes hemodynamic indices defined inVaMPy(see Table1 at https://kvslab.github.io/VaMPy/quantities.html). The only difference fromVaMPyis that WSS is defined as a first-order Discontinuous Galerkin function (DG1). This is because computing WSS involves taking the gradient of second-order Continuous Galerkin (CG2) function.
Usage: Run the following command:
vasp-compute-hemo --folder /path/to/your/result
This script can be run in parallel with MPI.
Output:
All the hemodynamic indies will be stored inside a newly generated folder Hemodynamic_indices
compute_stress_strain.py- This script computes the following solid mechanical metrics:
True (Cauchy) Stress – tensor
Green-Lagrange Strain – tensor
Maximum Principal Stress (True/Cauchy) – scalar
Maximum Principal Strain (Green-Lagrange) – scalar
Usage: Run the following command:
vasp-compute-stress --folder /path/to/your/result
This script can be run in parallel with MPI.
Output:
All the results will be stored inside a newly generated folder StressStrain
postprocessing_h5py#
Purpose: Focuses on postprocessing tasks involving HDF5 files, utilizing the
h5pylibrary.Contents: Includes scripts for creating spectrograms, chromagrams, high-pass visualizations, spectra, and applying chroma filters, along with common H5PY-related postprocessing utilities.
